
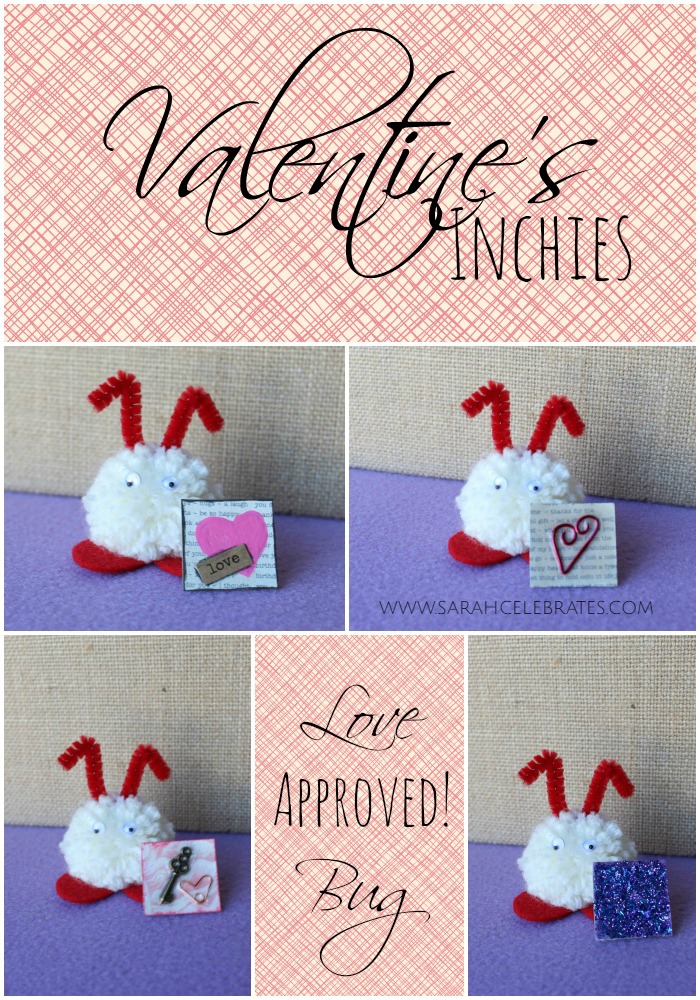
Valentine’s Inchies
Hello there =)
Did you enjoy last week’s Valentine’s artist trading cards? I think they’d be a great craft for kids to make to pass out at school. What do you think? Down with the store bought cards! Bring on DIY ATCs from here on out!
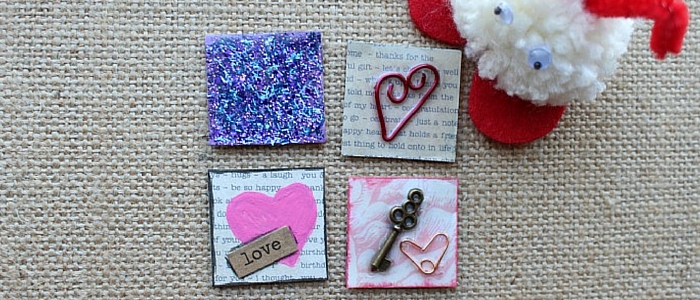
This week I went smaller… super small. Like one inch by one inch small. That’s right… INCHIES!
I prepped a dozen 1×1 squares but only 4 were finished made the cut. Working on a smaller “canvas” is WAY harder than I thought it’d be. Perhaps I’ll get the others ready by Valentine’s Day and I’ll share them on Instagram. Perhaps…
This post contains affiliate links. Read my full disclosure policy here.
You remember my Love Bug, right? He lives on my table and insisted he help out with the photos =) I think he needs a name…
Back to the inchies!
The base paper/card stock of these adorable little works of art is a cut up cereal box. Yup, a cereal box. I apologize, I’ve given you a reason to hoard more things you’d normally toss/recycle.
Let’s go over each inchie shall we?
The top left inchie was covered with a piece of scrapbook paper with random wording on it. I quickly painted a heart with bright pink acrylic paint. No muss, no fuss. Ok, I started with a heart drawn with my pink gelato crayon, outlined it in black and it looked AWFUL. I had to make that go away quick!
A sticker from one of my Tim Holtz ChitChat books and an outline of black completed the look.
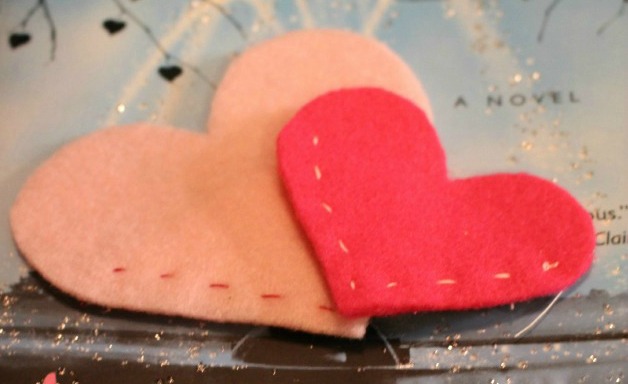
The top right and bottom left inchies have two things in common: wire work and Mod Podge Dimensional Magic. Wire work is like in progress gluing shots with me… you’re not going to get them. Sorry. All I can offer on the wire hearts is practice and head to Pinterest for inspiration.
Both inchies got a sweet paper background, a wire heart, a key to said heart in the bottom left one and a covering of Dimensional Magic to seal it in and give it a glassy sheen.
The bottom right is a glitter lovers dream. That’s all it is! Glue on the 1×1 square, glitter and Dimensional Magic to seal it in. Voila!
I hope you’ve enjoyed this tiny little pieces of art. I enjoyed making them. As they get easier to do (inspiration flows more) I’ll start making some videos for these how to’s.
Enjoy!

Oh my glob, so cute!
tee hee! I think they’re cute too ;)
Cute as a button! Now what do you do with them? Frame them and decorate the hallway wall?
I think I might stick them on Valentine’s cards… but that’s for next year ;)